How to Resize a photo?
The guide shows how to resize a single photo to 2400 x 3600 pixels and change its format to JPEG at 50% compression quality, and save a result to the Photo Library.
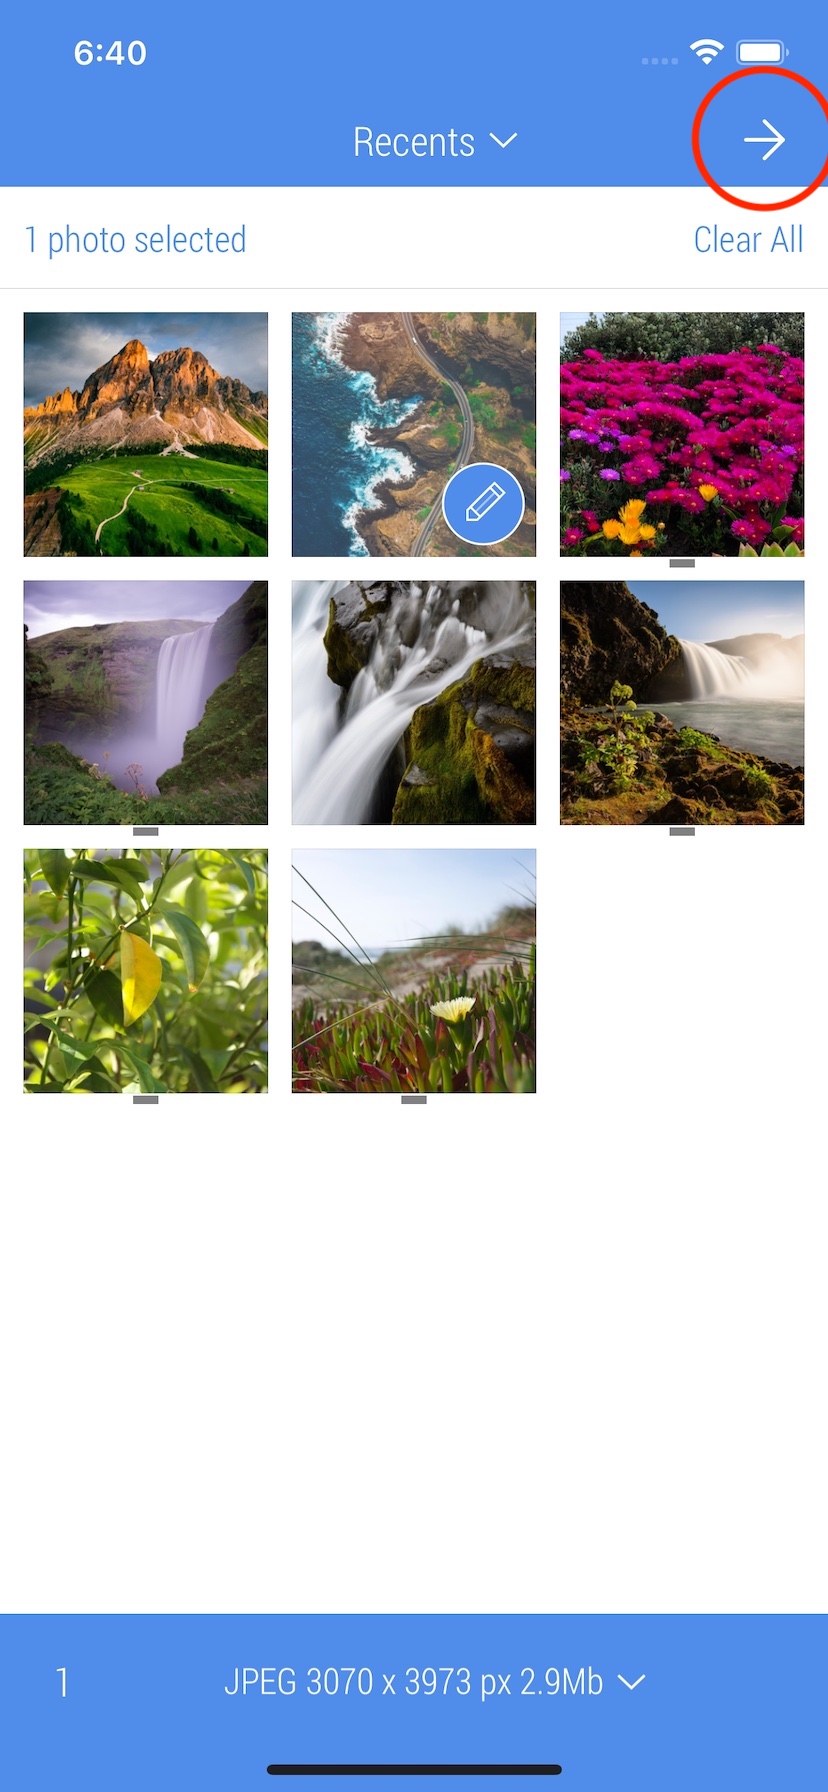
1. Select a photo and tap the upper right button to start editing
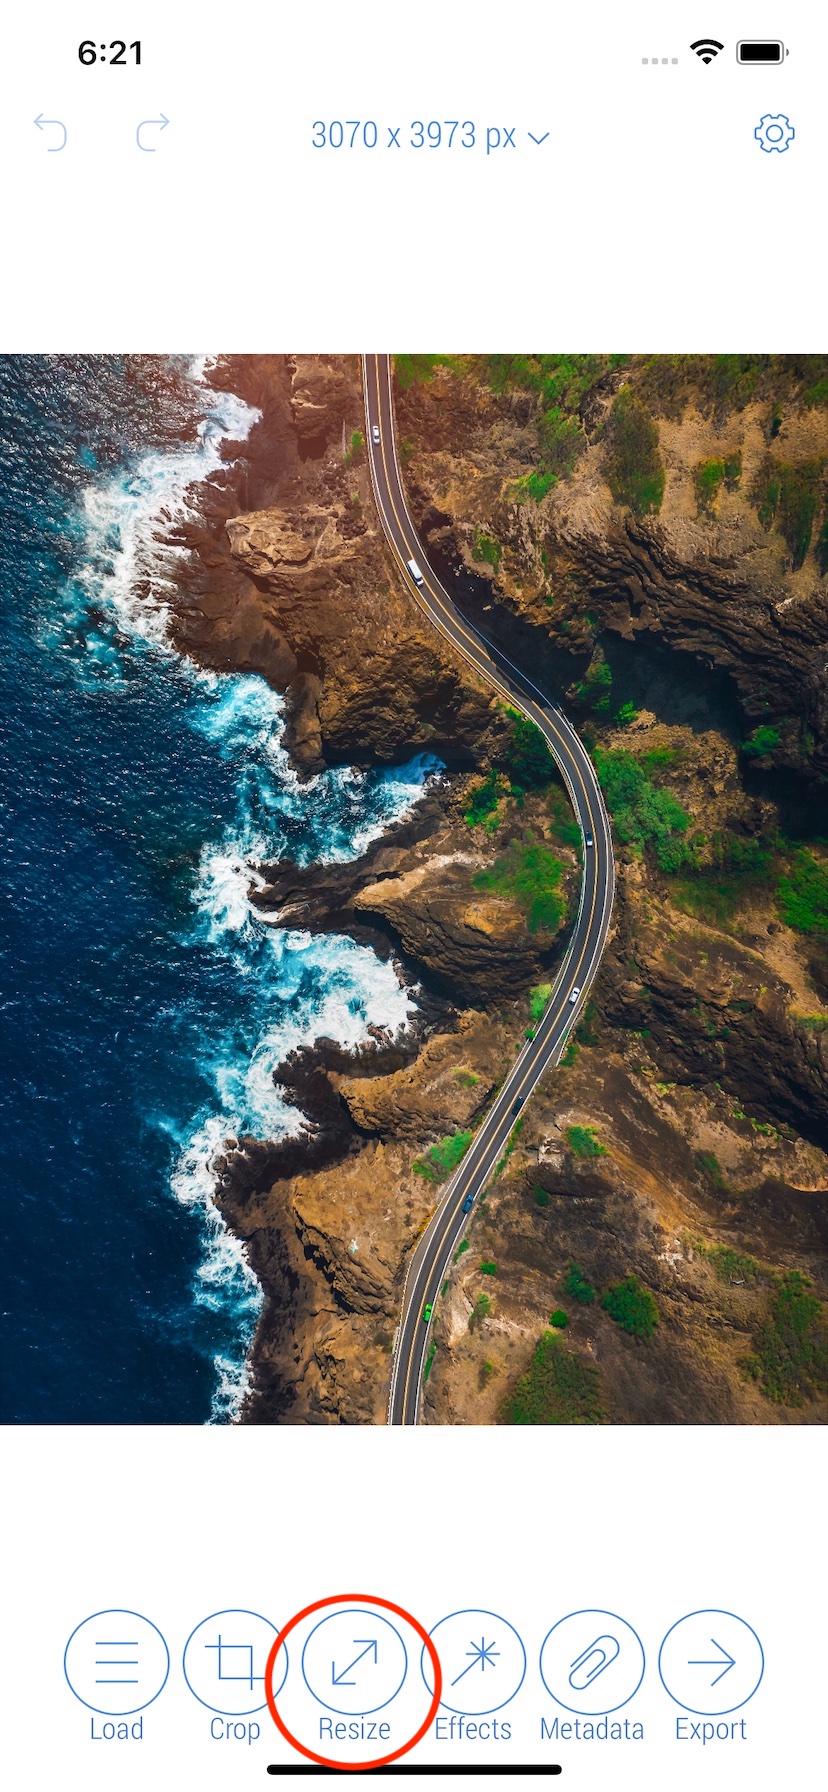
2. Tap 'Resize' button on the bottom bar
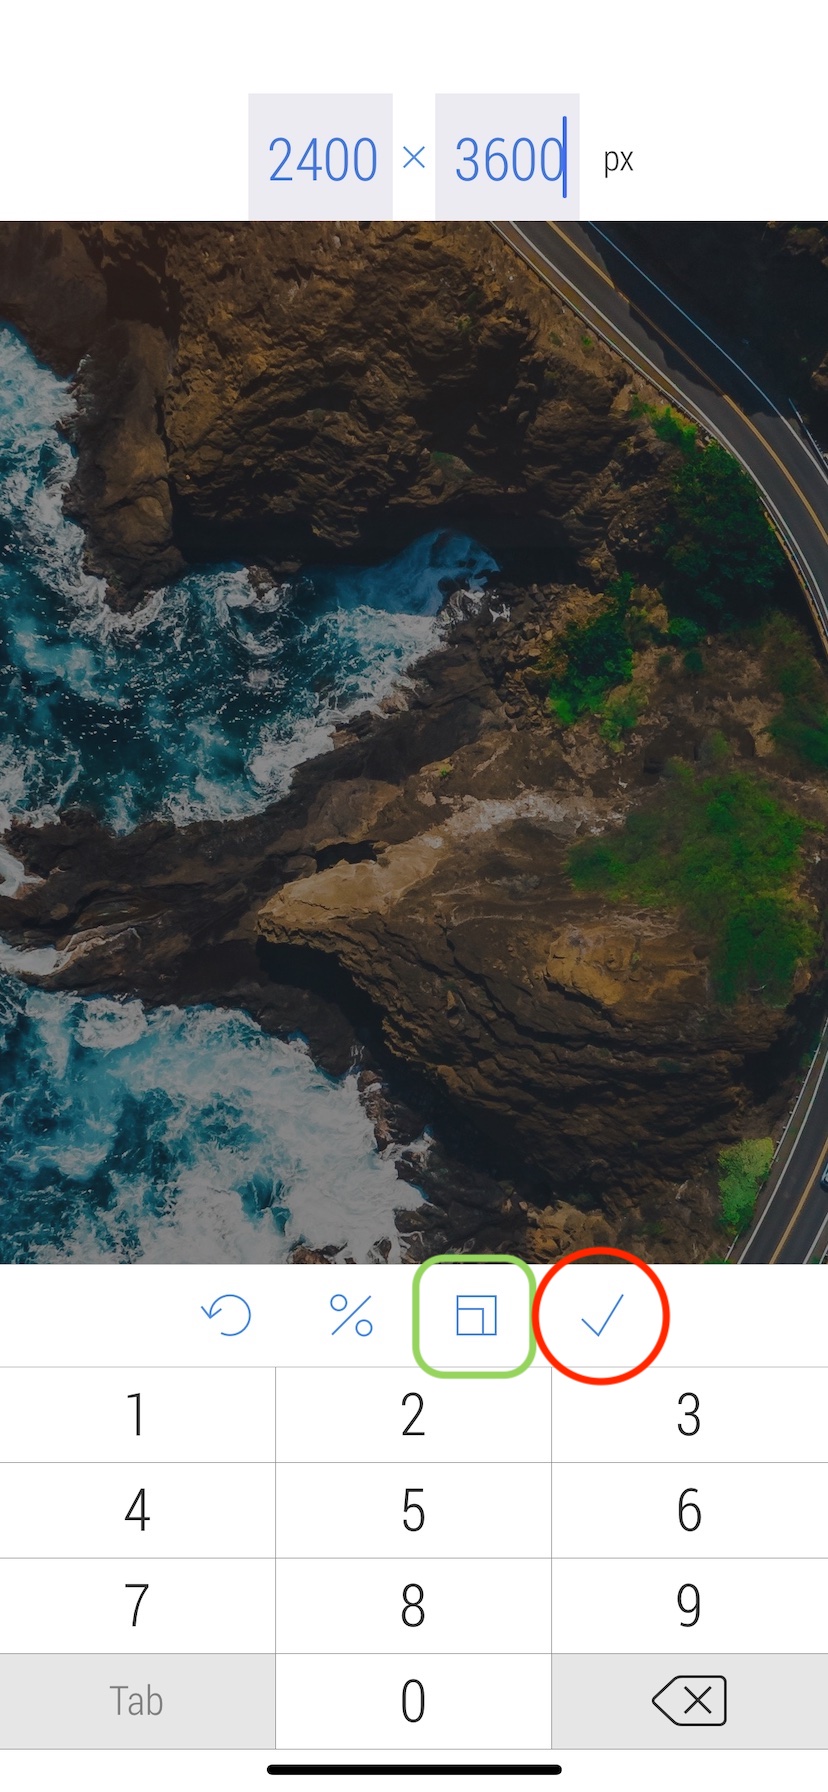
3. Tap 'Input' button on the bottom bar to enter a new size manually
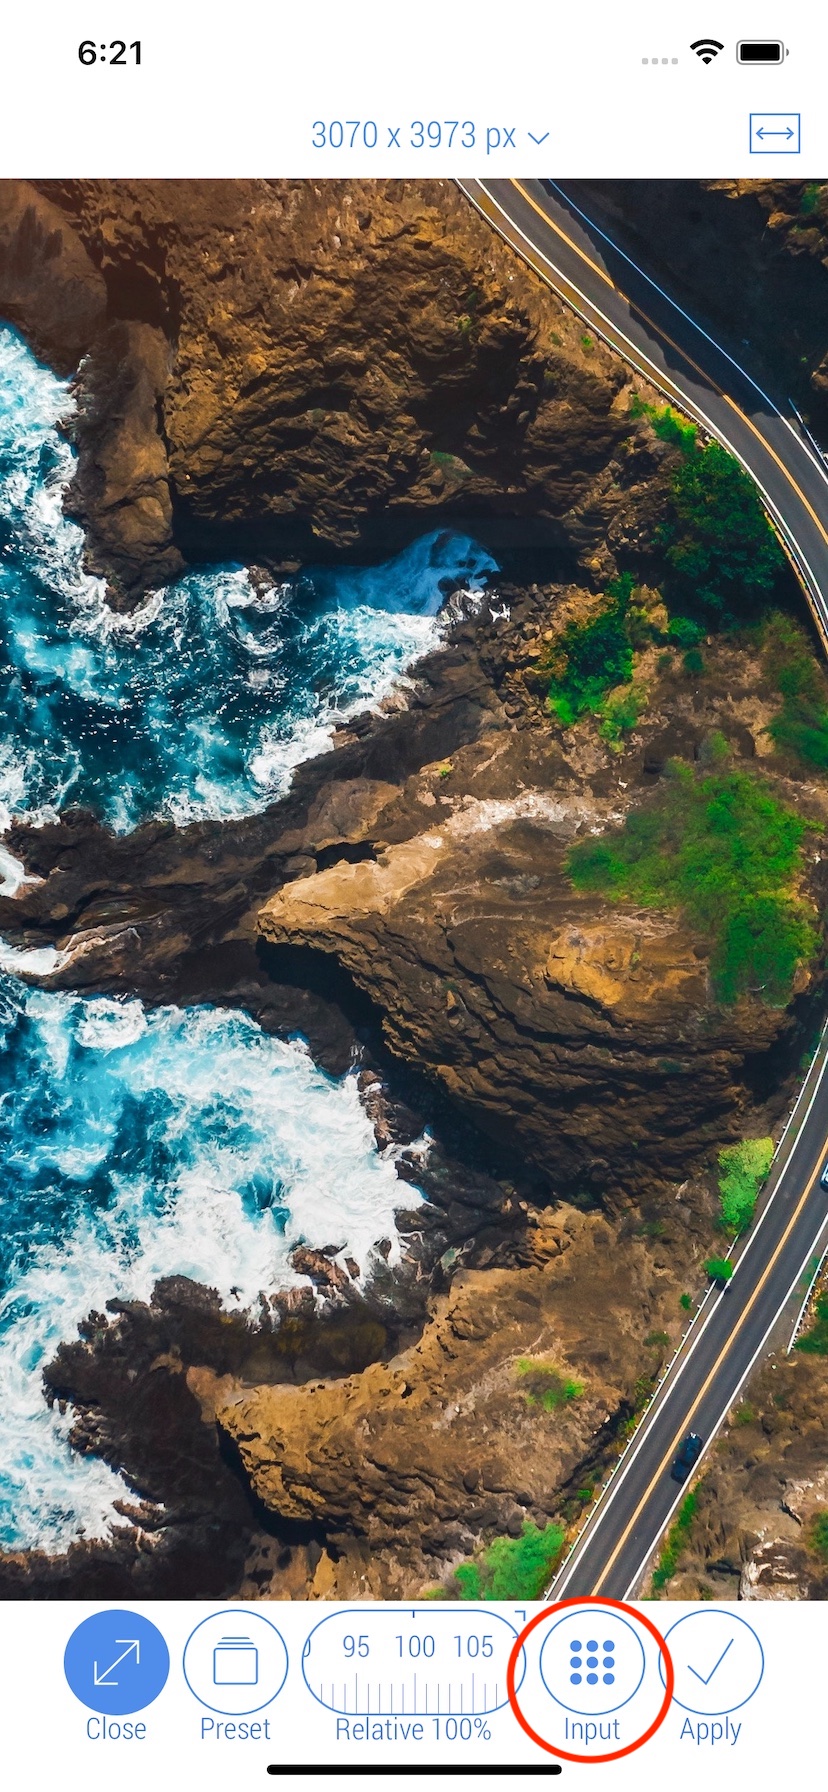
4. Use the Keyboard to enter a size of 2400 x 3600 pixels. It may need to disable 'Aspect Ratio' mode (marked green). Then tap 'Apply' button to finish entering size.
5. Press the top right button to change the 'Resizing Mode'. It defines how the new size is applied to the photo.
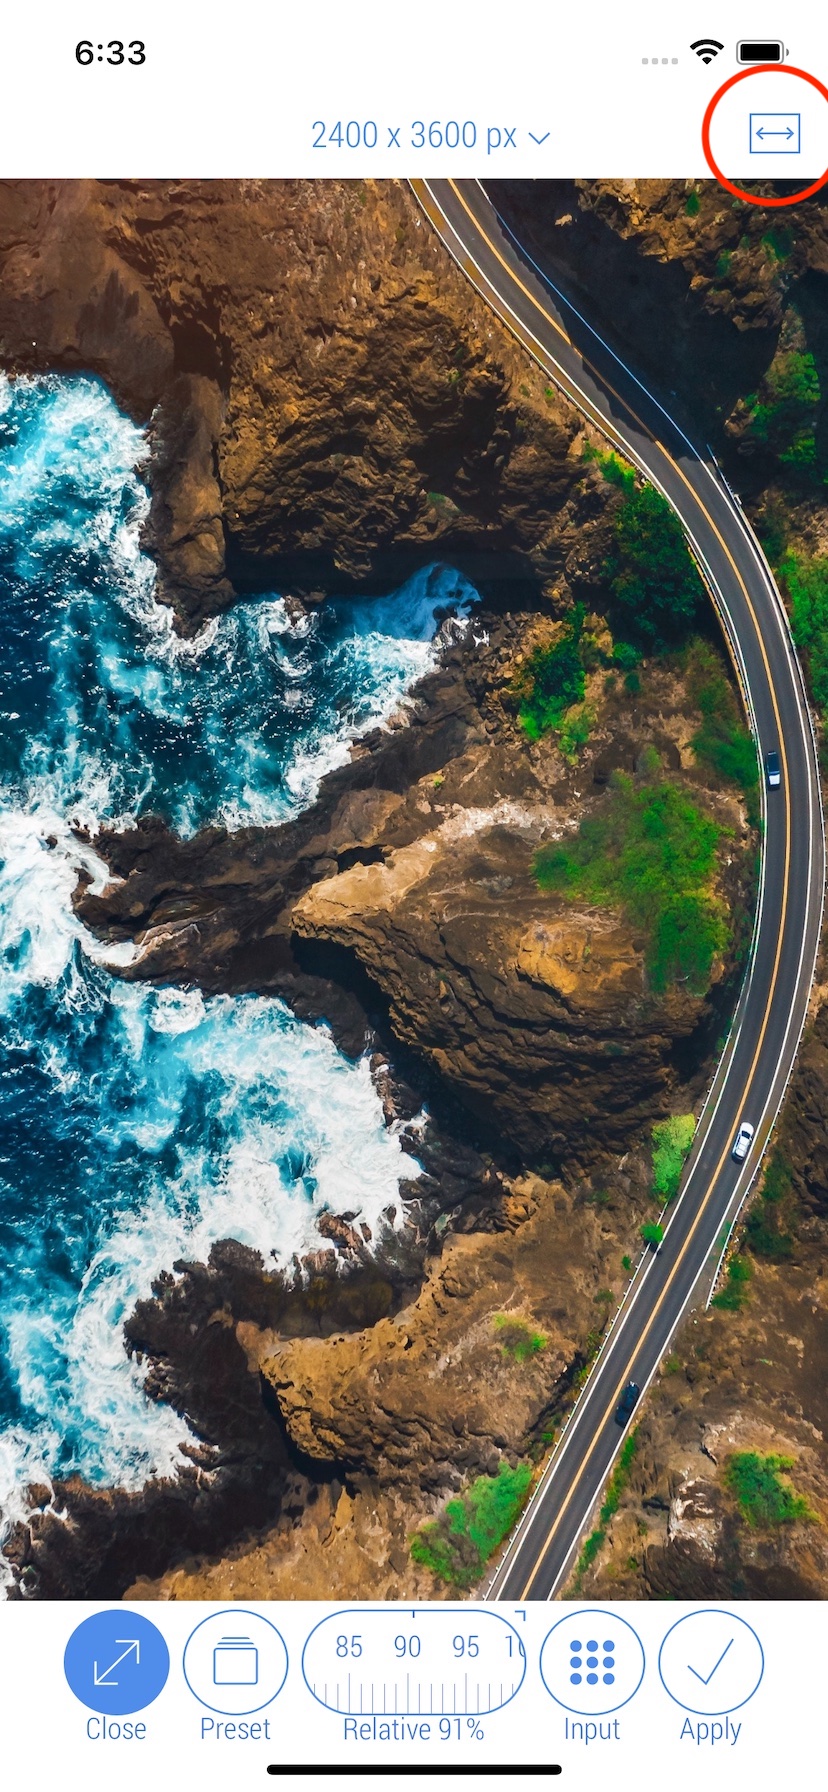
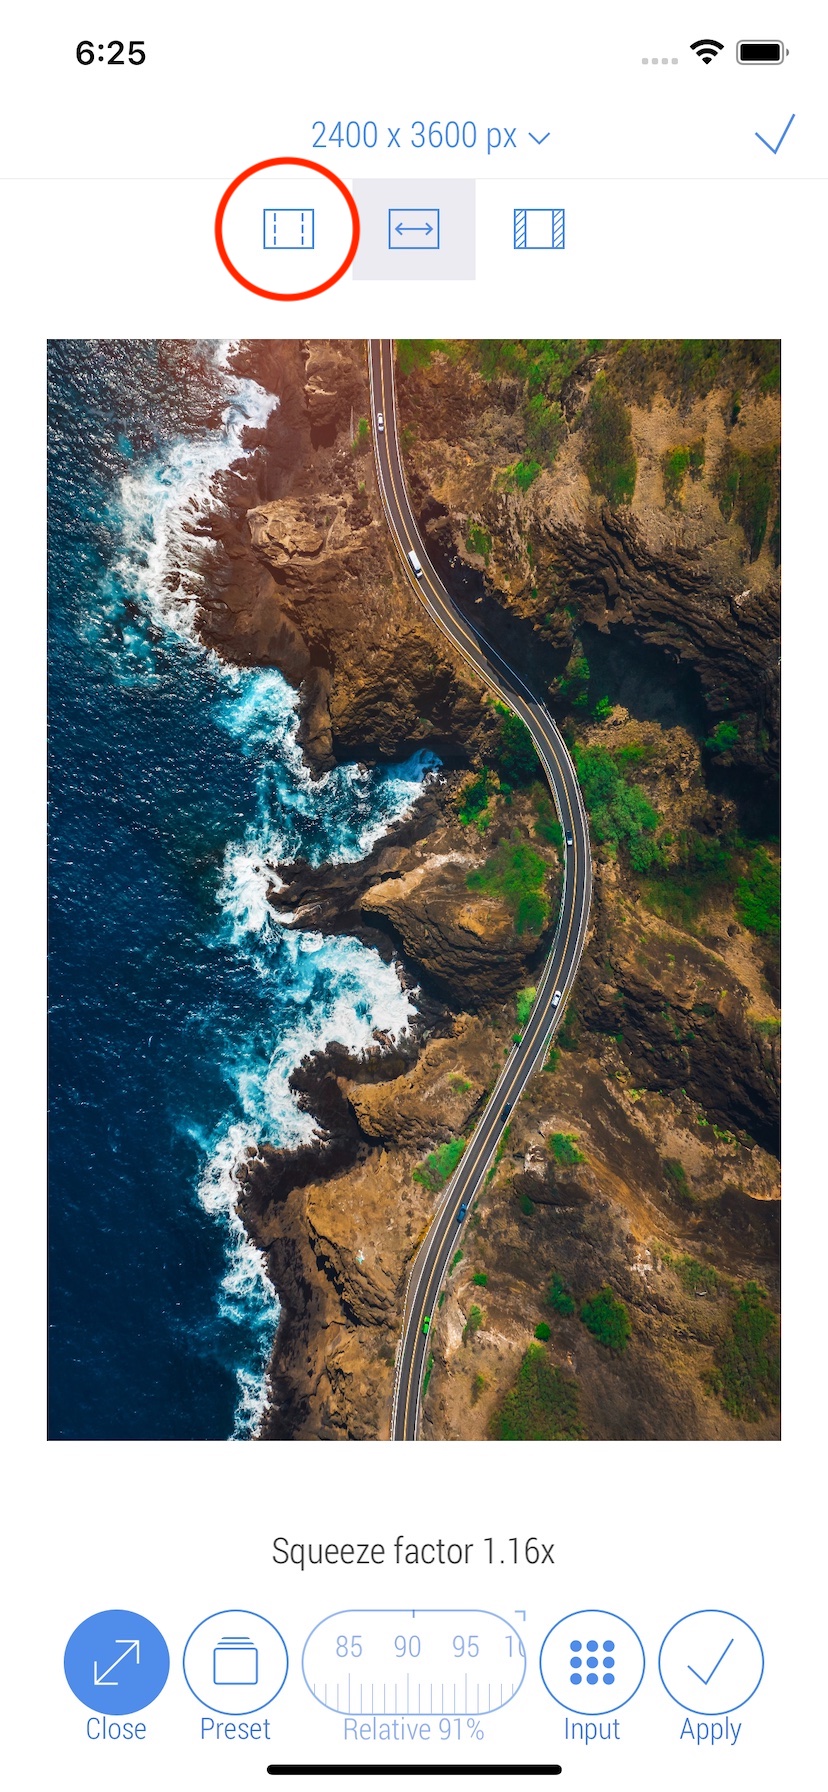
6. Default mode is 'Stretch'. Select 'Ratio Clip' when it is required to preserve Aspect Ratio and crop the photo from two opposite sides.
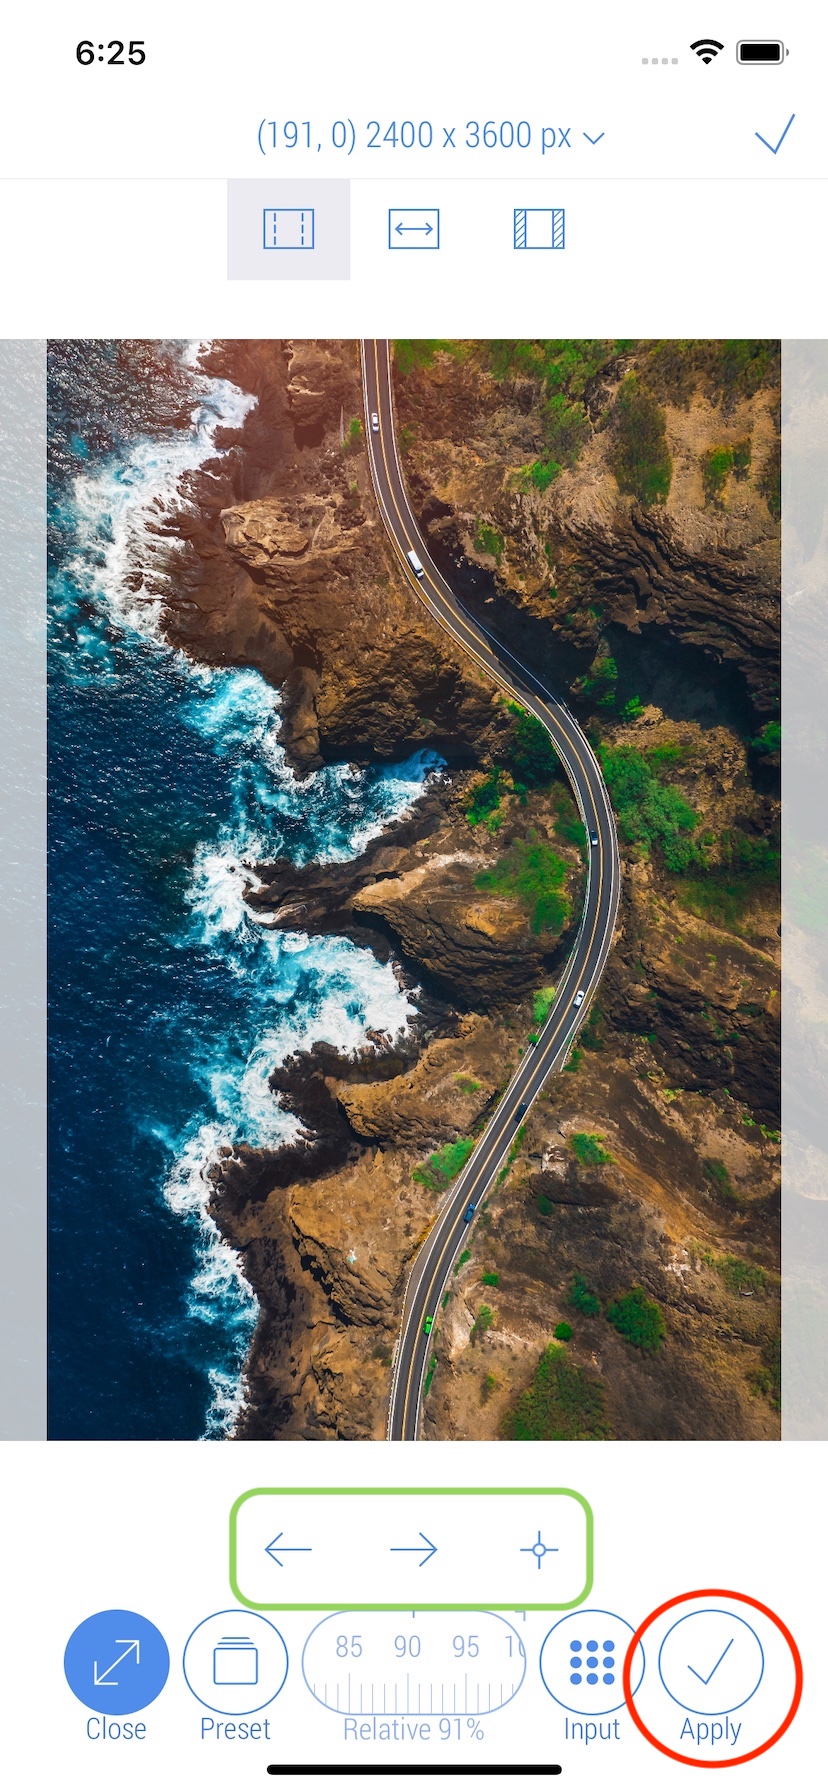
7. Use 'Ratio Clip' specific buttons on the bar just above the bottom bar to adjust the position inside the outer box (marked green). Tap 'Apply' button on the bottom bar to apply the new size to the photo.
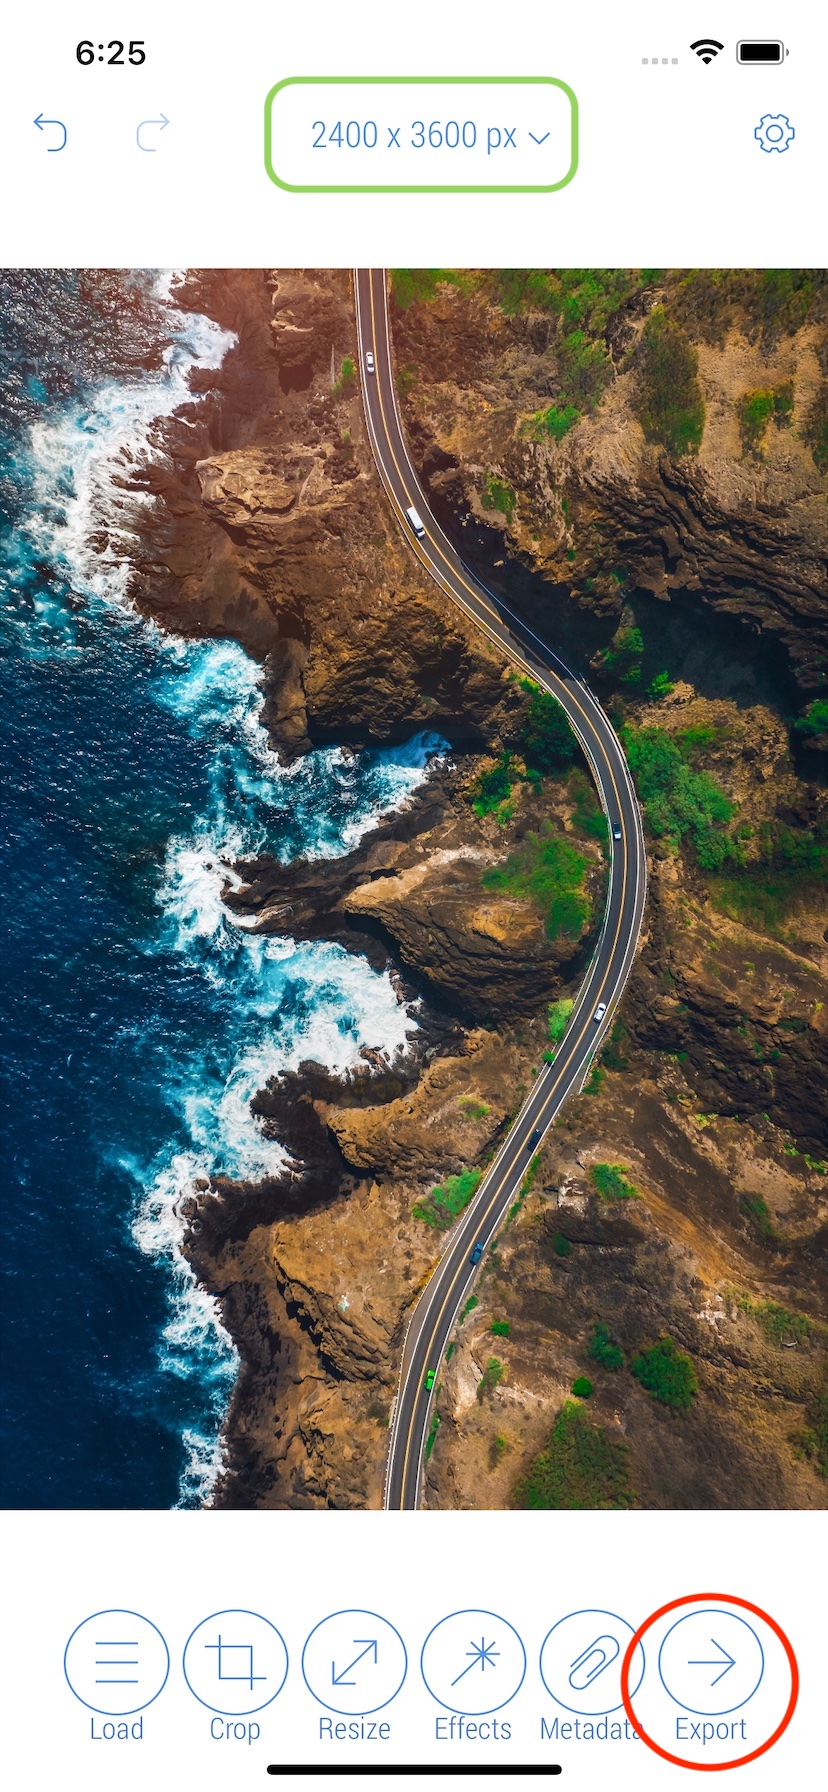
8. The current size of the photo is display on the top bar(marked green). Tap that area to get more details. Tap 'Export' button to prepare the photo for sharing.
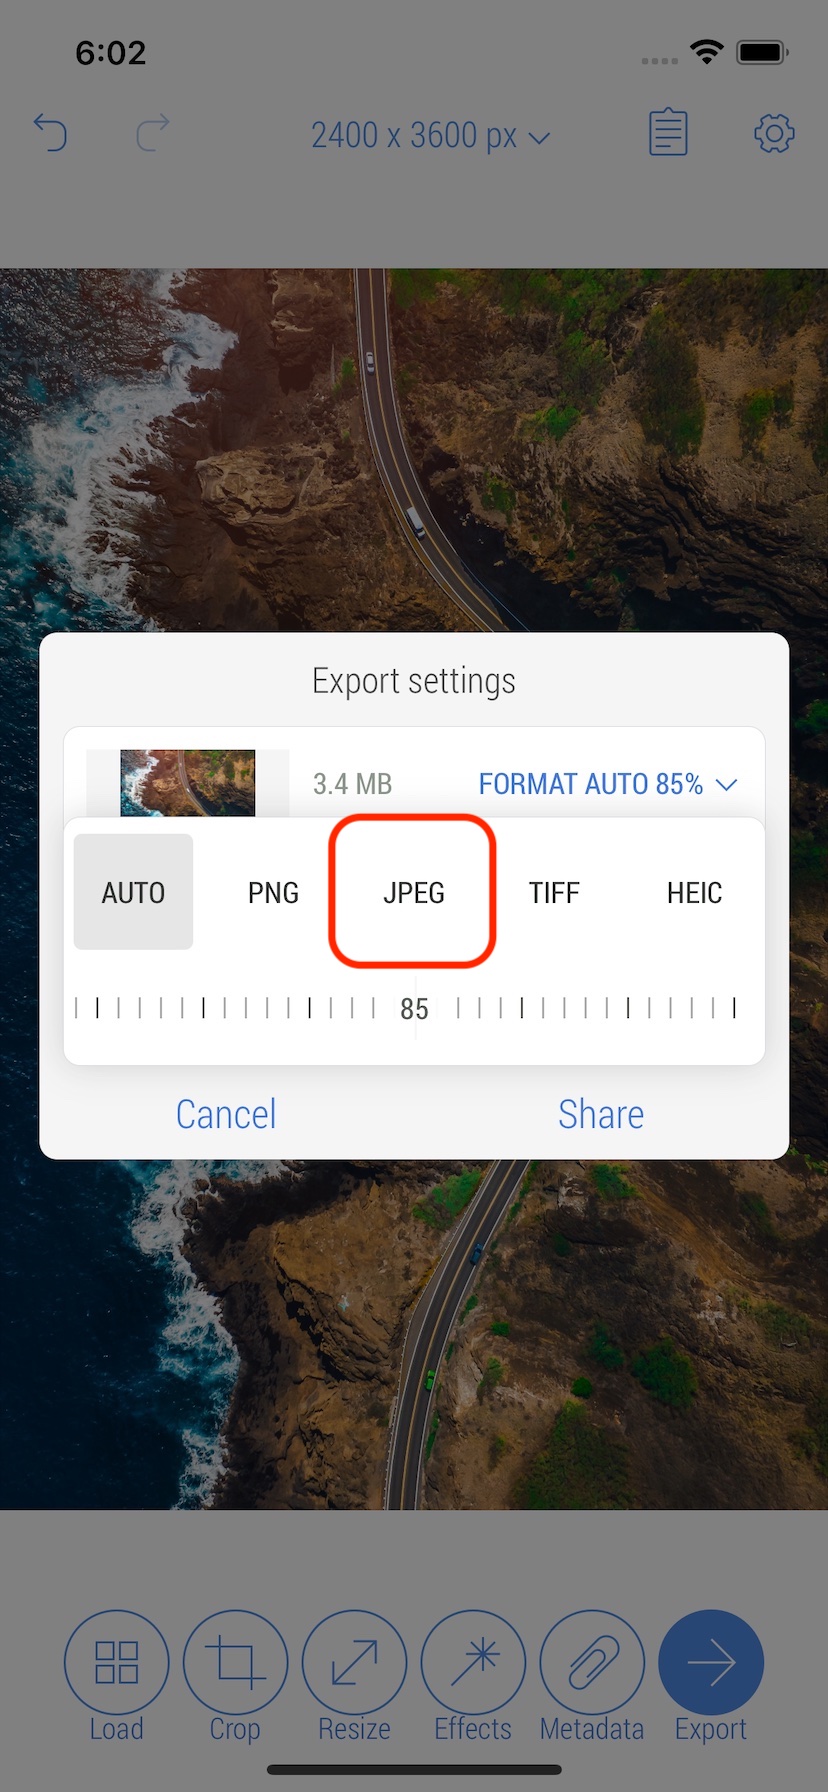
9. On the Export pop-up screen tap 'Format' button to specify proper format.

10. Select 'JPEG' format. When it is important to keep the original format set it to 'Auto'.
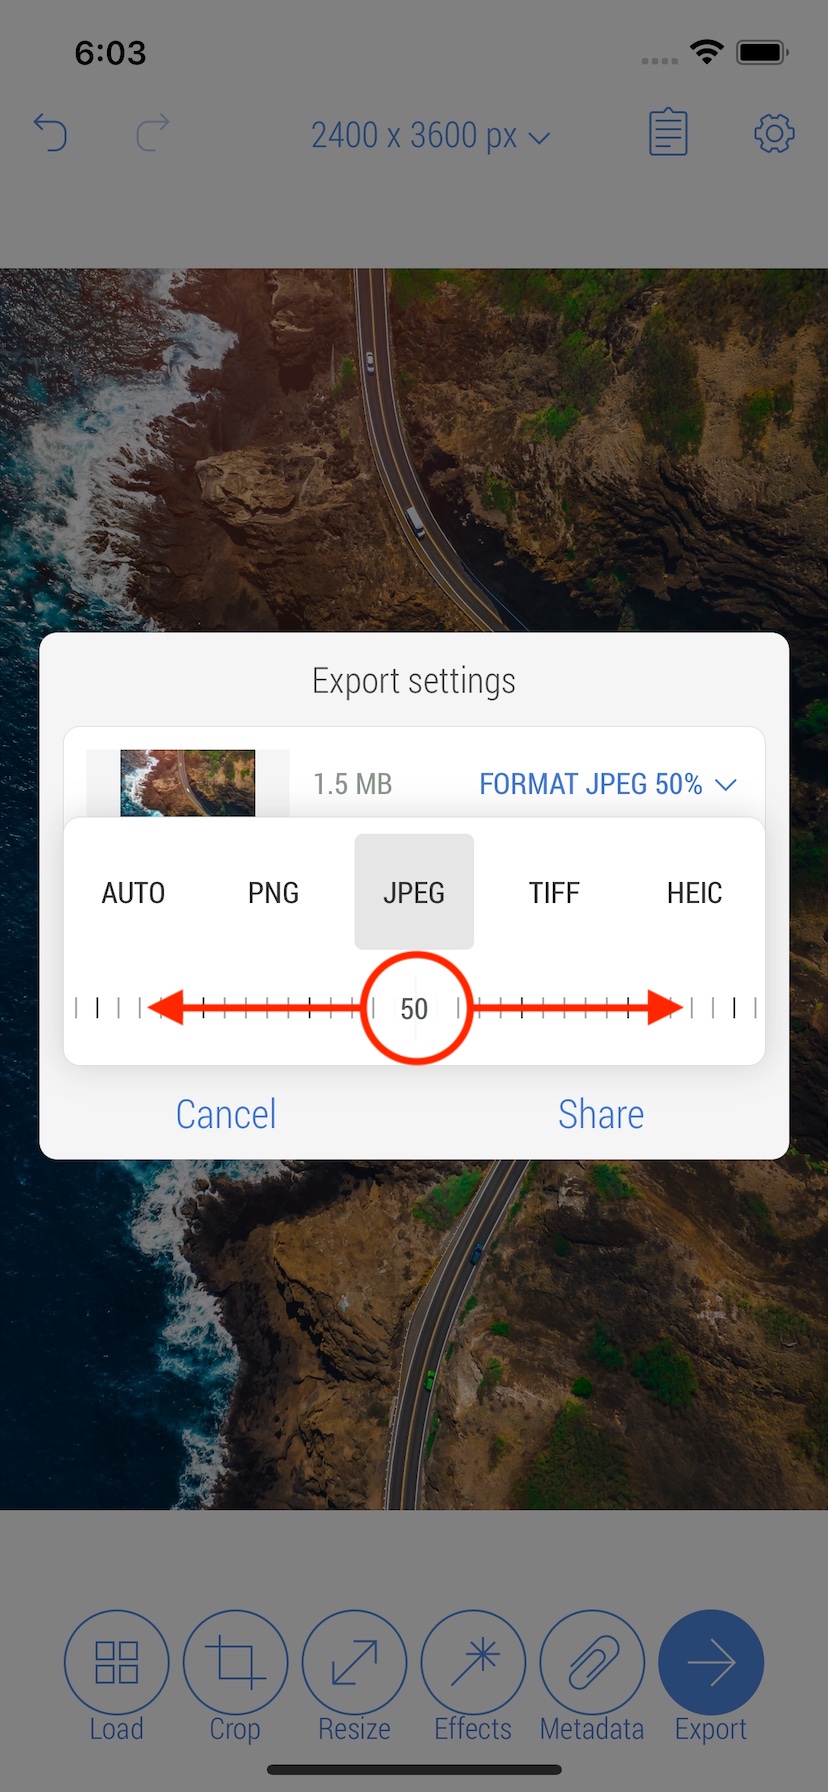
11. When 'JPEG', 'HEIC', or 'AUTO' format is selected, the compression quality slider is active. Scroll left or right to change its value. For the example it is set to 50%. Tapping on the left/right part of the scale decreases/increases value by 1%.
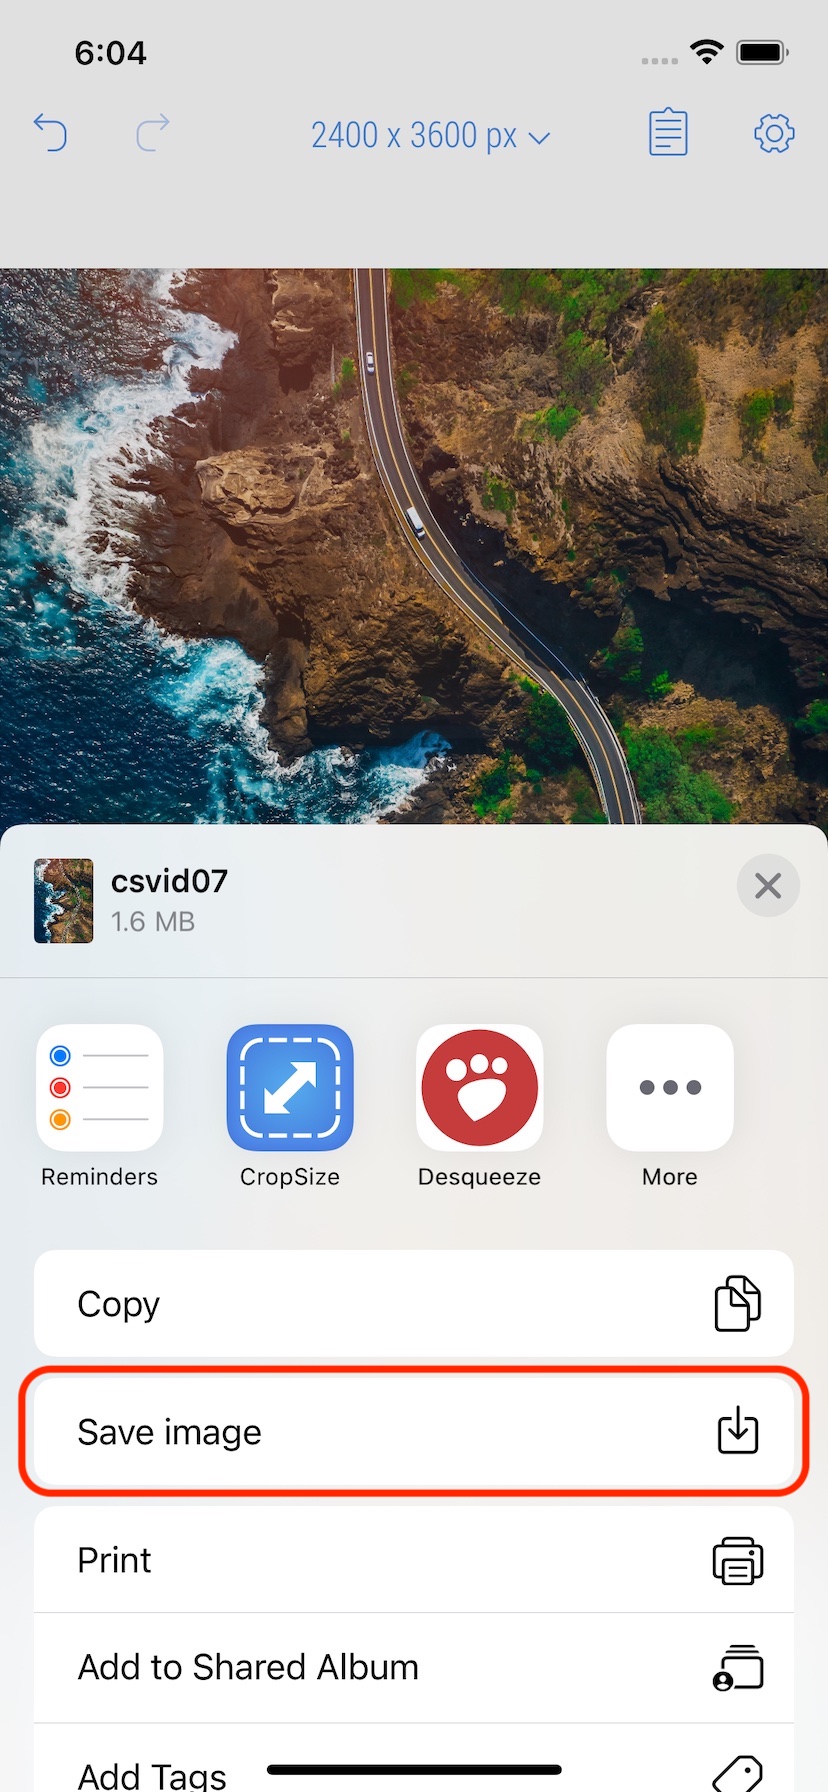
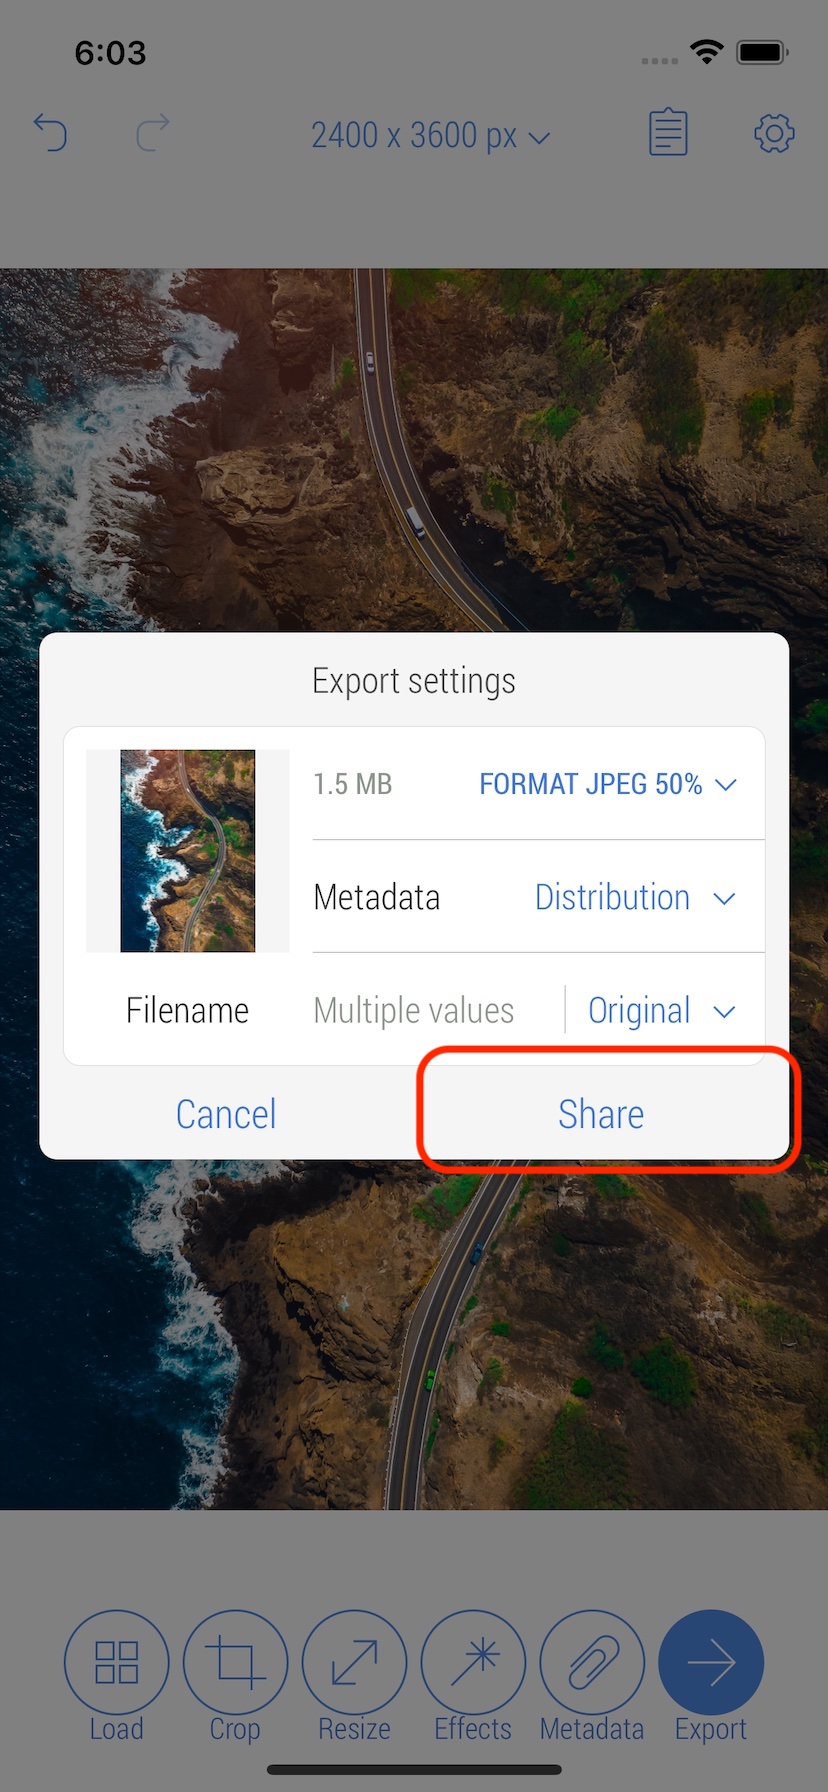
12. When all set tap 'Share' button at the bottom of the pop-up screen to share the result.
13. Tap 'Save image' to save the result to the Photo Library.